Packaging KiCad Files for Submission
Generating Schematic PDFs
Add Title Block Information
Open your project and then your schematic.
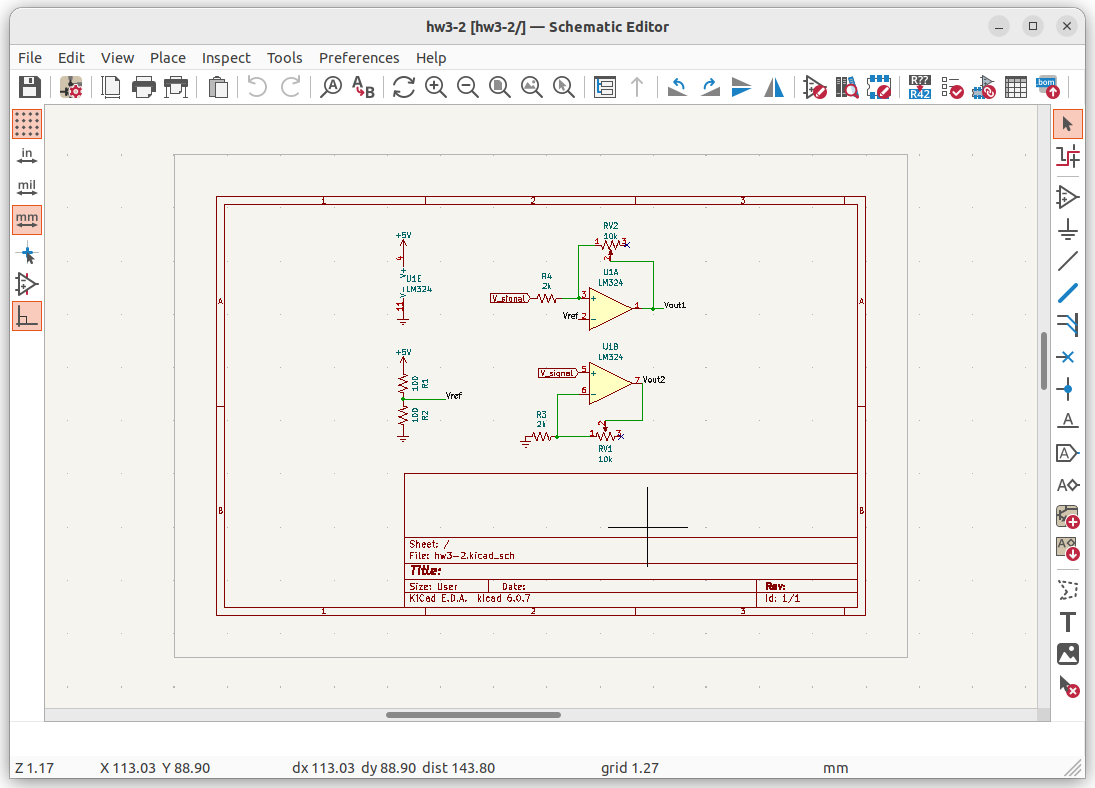 Figure
Click in the title block region. A popup menu will appear, which allows you to enter a variety of information into the title block region
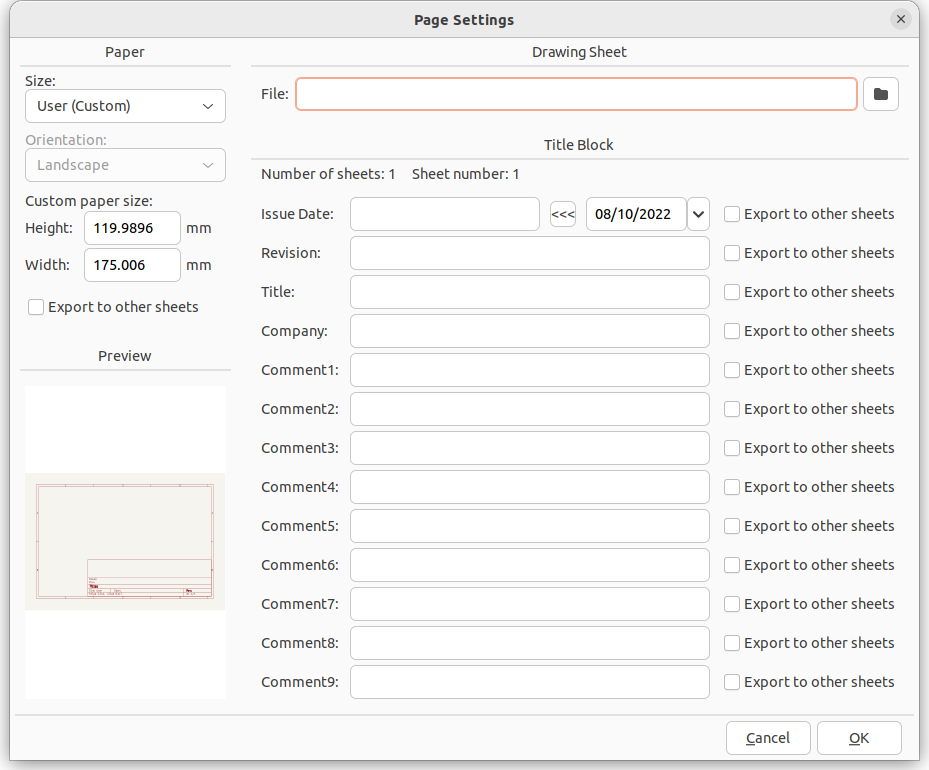 Figure
Click the “«” button next to the “issue date” field to copy today’s date in, or manually type the correct date of the revision.
Indicate the revision number
In the “Title” field, describe the schematic shown with as much detail as possible
Example: “Automatic Sunglasses Windshield Wiper Motor Driver”
In the Company Field, add your team number and name.
Example: “Team 100: Automatic Sunglass Windshield Wipers”
Click ok. The information will automatically populate in the correct spot.
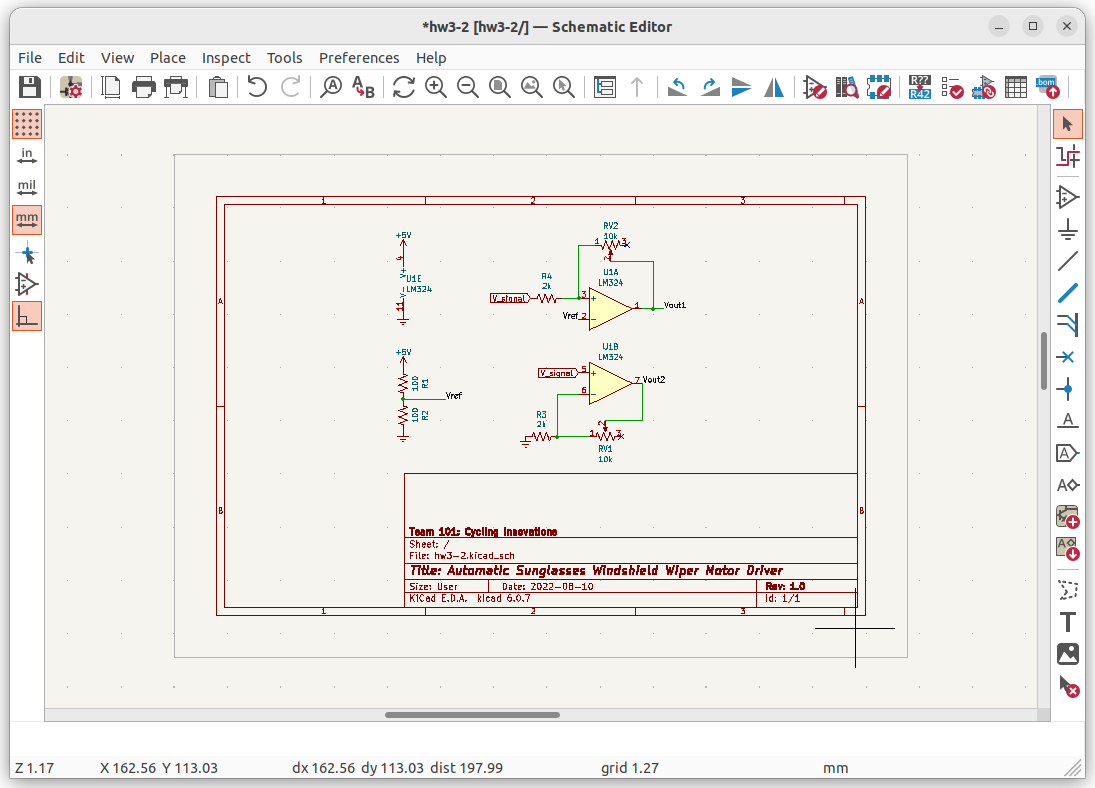 Figure
Plot
Click the “plot” button (next to the “Print” button but different.)
Select PDF as the output format
Keep other selections default.
Select “Plot All Pages” to generate
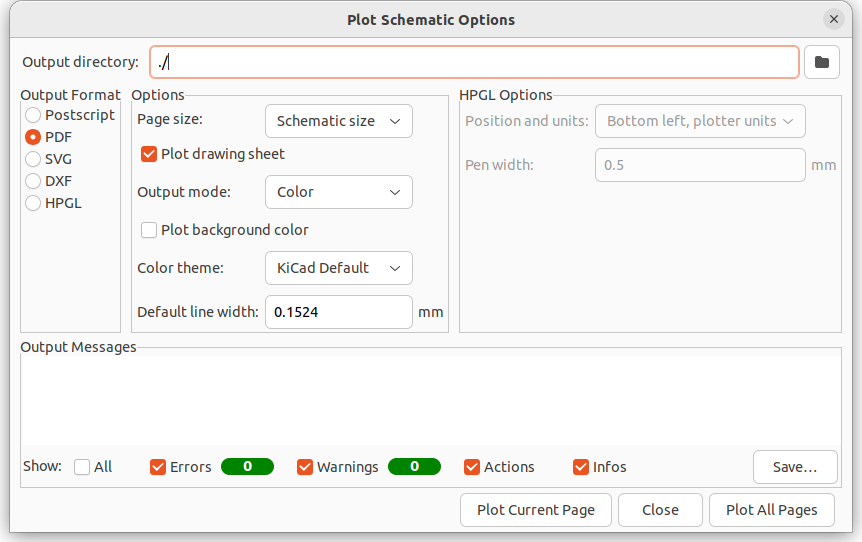 Figure
Generating PCB PDFs
There are several good options for generating vector-based images in Kicad:
- The File –> Print option gives you the ability to combine all layers into one image and apply colors to each layer. This is useful for seeing one side of the board at a time
- The File –> Plot option permits you to plot each layer separately in black and white for inspection and visual debugging.
- The File –> Export –> svg option permits you to create svg images that can be further manipulated in image editing programs like inkscape.
Zipping Project Files
Make sure any custom libraries used in the project have been copied as project table entries into your project folder.
Any further edits to the global library may not be reflected in the new project library so be sure to do this when you are ready to submit files for grading. In Symbol Editor, right click the library and select save as. Chose your current project folder directory and select “save as new project table entry” before saving. You may need to expand the “Save as” window to see this option.
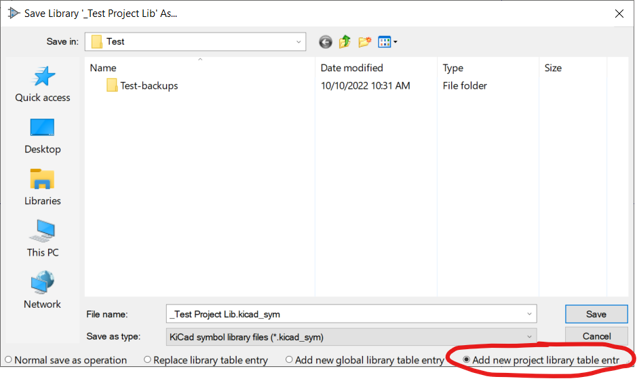 Figure
From the (main) KiCad project window, select File –> “archive project”
Select the file location and select “ok”.